最近玩12v光伏,因为泰山派RK3566可以直接使用12v进行供电,所以把买来从来没用过的泰山派找出来折腾了。
泰山派的官方固件太老了,而且我是不喜欢从百度云下载文件的,我将选择手动编译固件。
本此固件编译仅适用 泰山派RK3566。
本次安置使用的是支持嵌套虚拟化的虚拟机,系统使用的是 ubuntu24 配置为 i5-12600 16G内存 128G硬盘。个人更建议使用虚拟机。
注意请确定每个步骤运行正确,后再运行下一个步骤。
安装 git
1 | sudo apt update |
克隆仓库
1 | mkdir ~/code && cd ~/code/ |
安装内核编译依赖
1 | cd ~/code/amlogic-s9xxx-armbian/ |
使用 github Actions 过程使用的内核配置
1 | cp ~/code/kernel/kernel-config/release/rk35xx/config-6.1 ~/code/amlogic-s9xxx-armbian/compile-kernel/tools/config/config-6.1 |
接下来开始编译内核。如果在安装过程中出现让你配置内核的选项,可以修改 ~/code/amlogic-s9xxx-armbian/recompile 大概在 690行 #make ${MAKE_SET_STRING} menuconfig 取消注释,可跳过大量配置选项,参考修改来源 https://github.com/ophub/amlogic-s9xxx-armbian/issues/1833。 menuconfig 菜单启动后先选 save 保存配置,然后选择 exit 退出菜单。
到这里你可以制作一个快照 如果 armbian.tar.xz 下载失败,你需要恢复到这里节点,在编译开始时你会看到内核的版本号,这里需要记录一下稍后会用到,我本次编译的版本号为 6.1.118,参考 本地编译说明
编译内核
1 | sudo ./recompile -k 6.1.y -r unifreq/linux-6.1.y-rockchip -d true |
编译完成后在 amlogic-s9xxx-armbian 项目目录克隆 armbian 项目
1 | cd ~/code/amlogic-s9xxx-armbian/ |
开始编译armbian。编译的选项可以参考 armbian 的 README 上的动图,这里说以下我的选项,debian选择的12因为12内核版本是 6.1。debian current 内核我在 ubuntu22 上编译后,刷入固件成功启动,但是在 ubuntu24 上编译不了,这里选择刚在 amlogic-s9xxx-armbian 里编译的内核。反正最后都会被替换掉。还有就是选择无桌面环境,在我这里桌面安装后启动后桌面无响应。简单的说我全部选的第一项。
如果你想使用 debian13 并且想使用 debian13 的内核,你可以使用 ubuntu12 编译 github.com/armbian/build 后,直接刷入。
编译 armbin,运行该命令需要当前用户是 非root用户,并且配置 sudo。
这里编译出来的官方内核版本是 6.1.115,不建议直接使用,6.1.115 存在 hdmi 无输出的问题 https://github.com/ophub/amlogic-s9xxx-armbian/issues/3209
编译 armbian
1 | ./compile.sh BOARD=lckfb-taishanpi |
编译成的文件将输出在 ~/code/amlogic-s9xxx-armbian/build/output/images/ 目录,文件名类似 Armbian-unofficial_<version>-trunk_Lckfb-taishanpi_<distribution>_vendor_<kernelVersion>.*
编译完成后回到 amlogic-s9xxx-armbian 目录,进行二次打包,编译过程参考 本地化打包
1 | cd ~/code/amlogic-s9xxx-armbian/ |
编辑 rebuild 文件将 download_kernel 函数下覆盖为 copy_local_kernel 函数,该函数基于 download_kernel 函数进行修改,目的是将从github下载内核改成使用本地内核。
1 | copy_local_kernel() { |
然后在文件末尾处找到 download_kernel 掉换成 copy_local_kernel
修改好后开始二次打包 注意 6.1.118 需要修改为你编译内核时获取到的版本号。
1 | sudo ./rebuild -b lckfb-tspi -a false -k 6.1.118 |
编译好后 在 ~/code/amlogic-s9xxx-armbian/build/output/images/ 目录内的 Armbian_<version>_rockchip_lckfb-tspi_bookworm_<kernelVersion>_server_<today>.tar.gz 文件就是二次打包的文件,使用前记得解压哦。
固件安装说明
注意使用 armbian 过后下次刷入固件仅支持 MASKROM升级模式,进行升级,除非你再将原版镜像刷回去。而且也不是像泰山派文档说说的使用方式和 LOADER模式 没有区别。
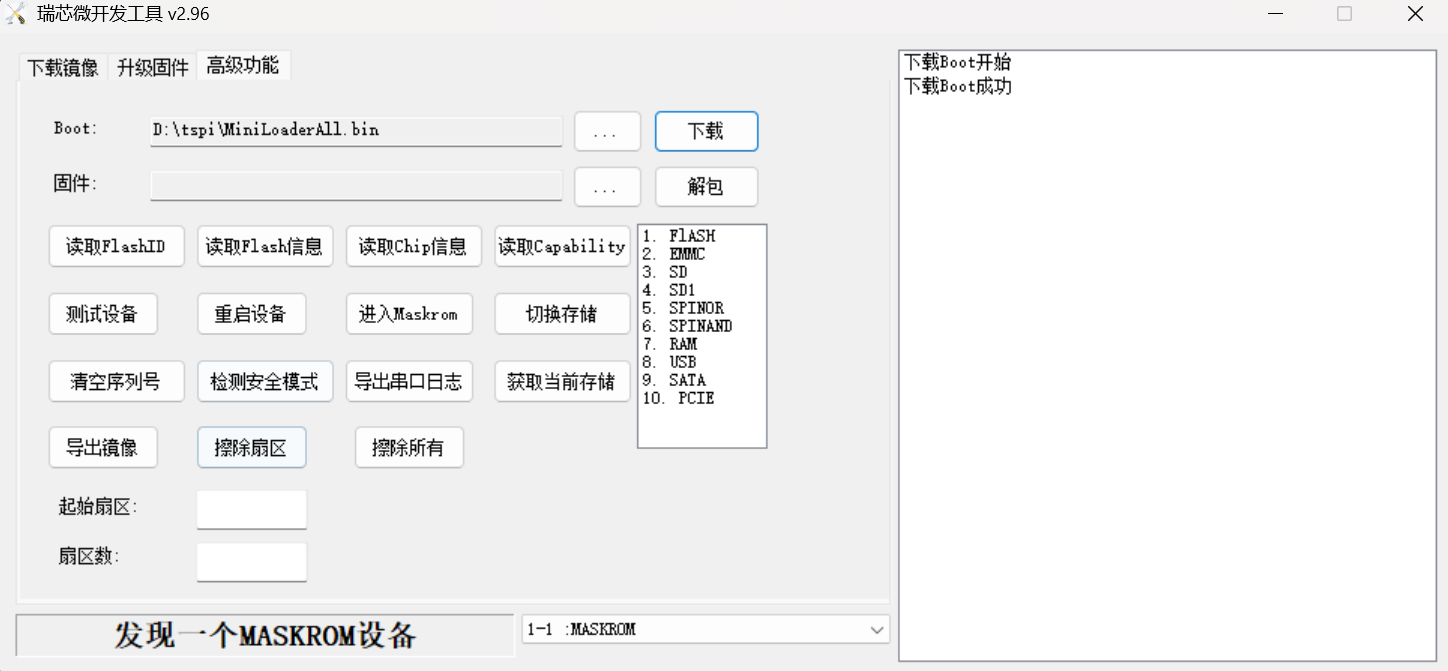
刷入一次armbian后下次刷入固件,下次刷入将读取不到信息,在进入 MASKROM升级模式后需要先下载 boot,MiniLoaderAll.bin 文件从泰山派RK3566原版镜像获取获取从,手动编译 https://github.com/CmST0us/tspi-linux-sdk 从这个的编译镜像中获得,我会选自己编译,因为泰山派的镜像放在百度云的,我编译一次的花费的时间比从百度云下载短得多。
在下载 boot 后建议在固件写入前点击一次 擦除所有
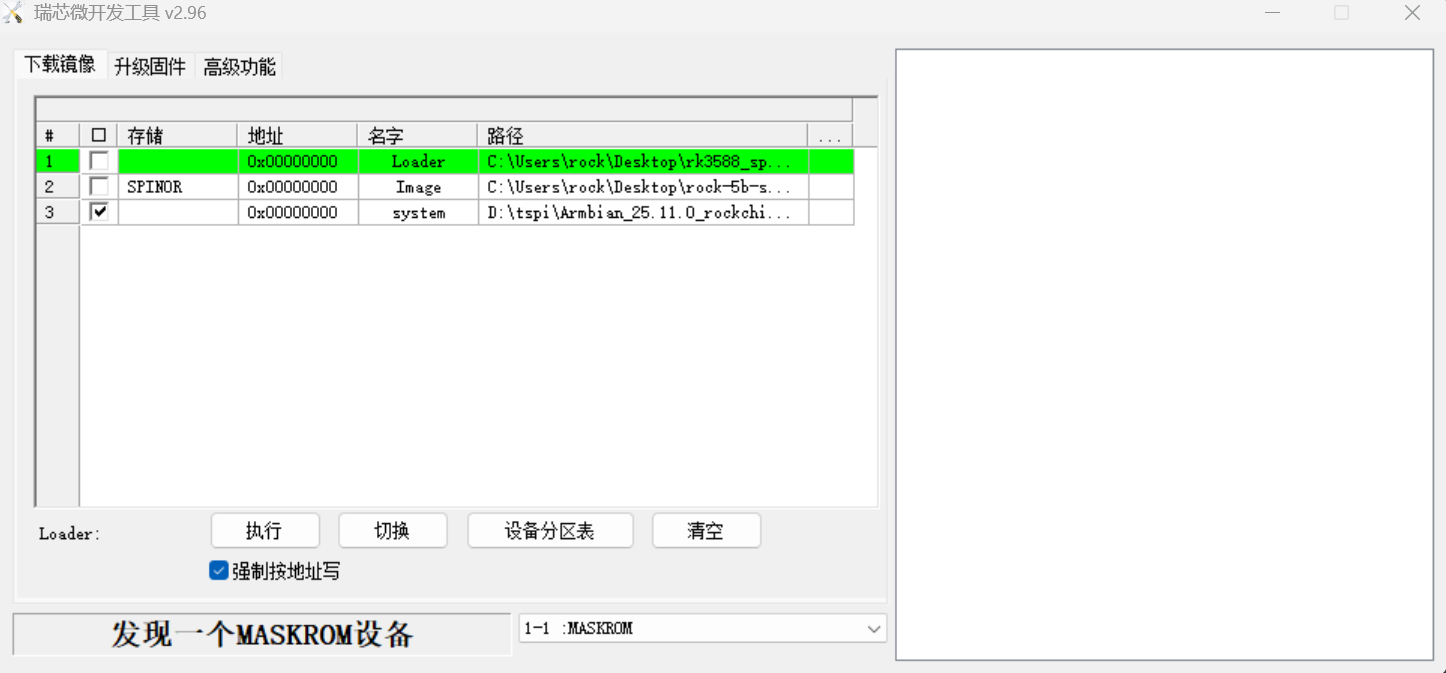
写入镜像使用使用镜像下载,右键新建行,地位为默认的 0x00000000, 名字随意 我写的 system,点击路径旁边 ··· 对应的选框可以选择你要写入的镜像。写入项目仅勾选刚刚新建的选择,其它写入项目全部不选择。
写入前,记得勾选强制写入。
就像下面这样。
本次编译的 amlogic-s9xxx-armbian 固件默认用户名为 root 密码为 1234 amlogic-s9xxx-armbian
在此特别感谢群友 香草 大佬对本次编译的帮助
本次编译用到的 仓库以及他们的 git hash值,如果编译失败可以使用本次编译的相同的 git 节点
1 | https://github.com/ophub/amlogic-s9xxx-armbian 47c0864 |
灯光调整
安装后板载的三色灯会默认闪烁,不喜欢可以关闭,参考 点灯
我设置为蓝灯在系统启动后常亮,红灯绿灯关闭,下面是灯光控制命令。该调整在系统重启后依然生效。
1 | echo "default-on" > /sys/class/leds/rgb-led-b/trigger |
在写下该文档的几天后我泰山派接入光伏供电了,然后板子烧了